therealtimjones.com We poke a little fun in the video, but we also conform to the EPAs instructions for cleaning up a compact fluorescent light bulb break on a hard floor surface. Each compact fluorescent light bulb contains between 4 and 5 milligrams of Mercury, a lethal neurotoxin. ...
Saturday, November 26, 2011
Saturday, November 19, 2011
Ore International 5 Arm Arch Floor Lamp - Black
!±8±Ore International 5 Arm Arch Floor Lamp - Black
Brand : Ore International, Inc.Rate :

Price : $89.90
Post Date : Nov 20, 2011 01:38:04
Usually ships in 24 hours
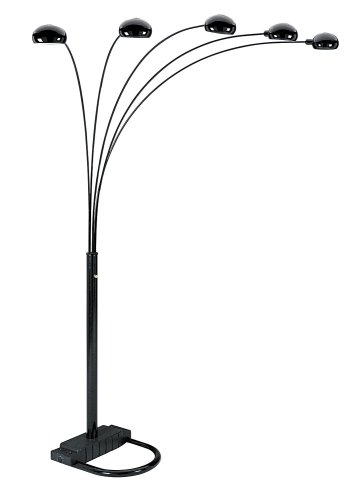
This five-armed arch floor lamp has a unique, modern design that is sure to brighten up your home decor. The adjustable arms of this metal floor lamp arch like a palm frond to whichever angle you desire, and the lamp's dimmer switch adjusts the intensity of light according to your needs or mood. Available in black, brass, nickel, and white finishes, this modern arched floor lamp is sure to be a perfect fit for your home or office.
Friday, November 11, 2011
How to Install Your Wall Decal
This is your step by step instructions to apply your very own wall decal. Let's get started.
Step One.
The first and probably the most important step is to make sure the wall you have chosen is clean and dry. To make sure of this I recommend that you use hot water and a towel and thoroughly clean the surface. Then allow plenty of time to dry, decals need to be applied to a very dry wall. One other thing I would recommend is that you choose a wall without any textures, the more smooth the easier. If your heart is set on a certain spot and the wall is textured, no worry to fret I have applied numerous decals to very textured walls myself, you will just need to be extra careful and I will make note of when later on in the steps.
Step One-a.
Important: once the decal is applied it cannot be reused so make sure you are in love with it. I would recommend that you hang it up with tape for a day or two so you can see how it looks and get a feel for it.
Step Two.
Now that you have chosen where you want them placed and the wall is prepared it is time to begin applying the decal.
To make sure that your wall decal is placed correctly and level (for words this is very important) I recommend that you tape the top two corners to the wall just as you want it then fold it up to start the process of taking off the backing. This step is very important and should not be rushed, take your time and make sure that the decal is removed from the backing without causing any damage.
Step Three.
Now that the backing has been cleanly pulled back fold the decal down so that it is in place and secure the bottom two corners with tape so that it is firmly attached to the wall. If your decal came with an application tool, great! if not I recommend using something with a firm flat surface. Now, press the tool across the decal with controlled strokes until the decal is firmly attached to the wall. This may be the tough part for those of you who chose to put your decal on a textured wall. You will need to take extra time during the application process and it might be helpful to use a sponge or something soft to ensure that the backing connects with the wall.
Step Four.
Now just set back and listen to everyone compliment you on your beautiful wall decal!
Subscribe to:
Posts (Atom)
|
|
|
|
|
 |
 |
 |
 |
 |
 |
 |
 |